¶ Manual Partitioning Guide
When partitioning your drive manually during Nobara installation, you must make sure that you create at the VERY LEAST the following partitions in the specific order shown in this guide!
¶ Partition Table
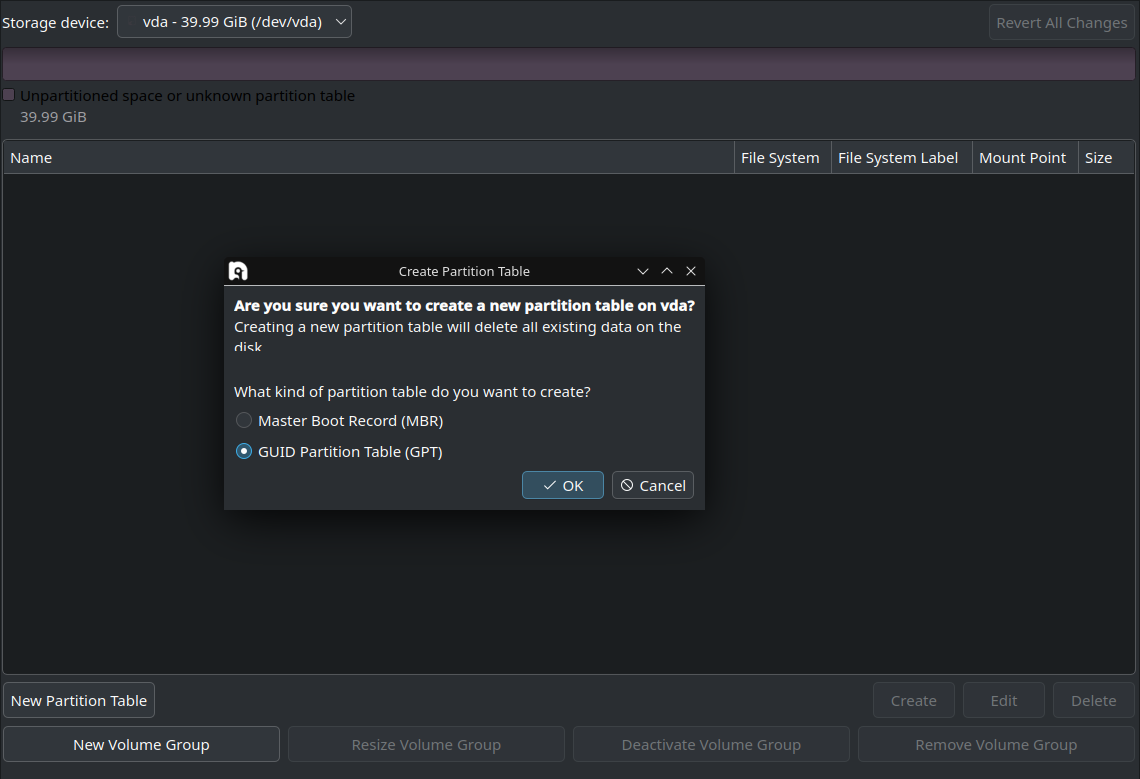
After selecting "Manual Partitioning", you will be greeted by the partition manager screen. Start by making a new partition table as shown in the picture.

¶ /boot partition
Next, select the table you just created from the list and click on the "Create" button on the bottom right. Create a new EXT4 partition with a size of at least 1GB and select its mount point as shown in the picture.
If you're using an Nvidia GPU, you might want to make it a bit larger (around 1.5-2GB just to be safe) since the kernel module is also put in this partition and 1GB might not be enough for 3 kernels + Recovery (Fedora default)

¶ /boot/efi partition
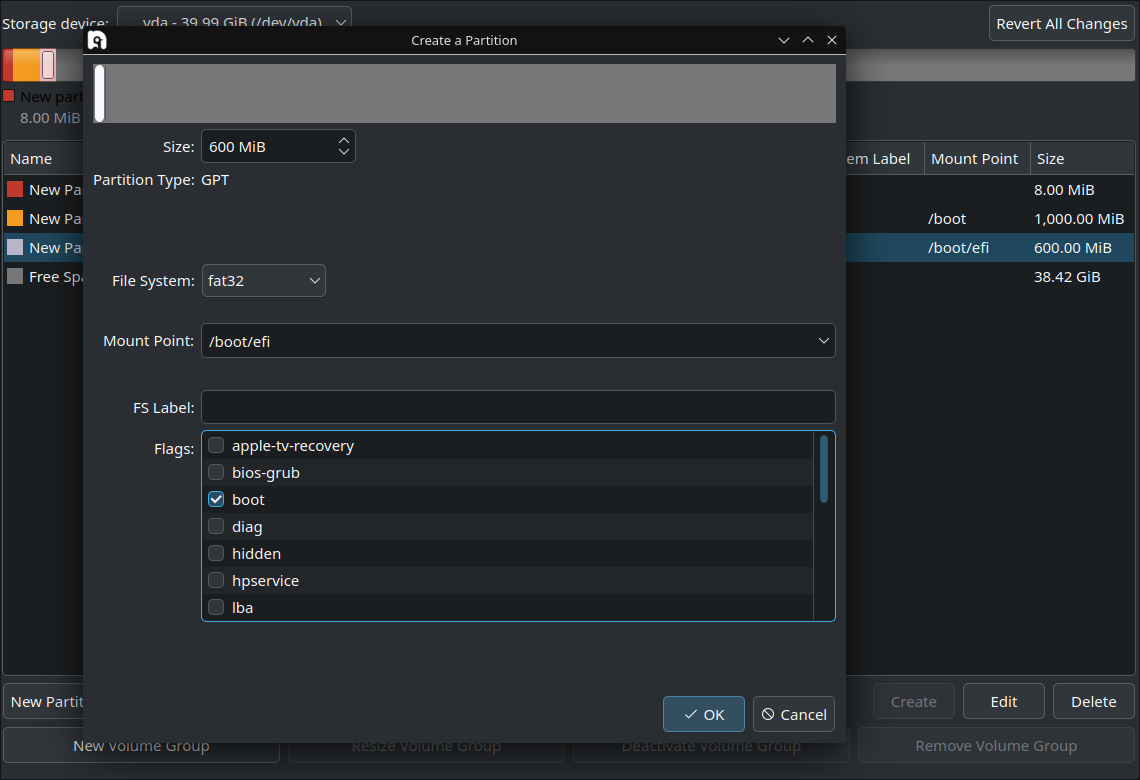
Next up, the EFI partition. Again, select the empty space that should still exist in your table and click on the Create button on the bottom right. You want to make this partition around 600MB in size, just to be safe, and the File System fat32. Make its mount point /boot/efi (you will have to manually type at least the /efi part) and make sure to click the boot flag as shown in the screenshot below.

¶ root partition
Finally on the list of minimum required partitions is root. If you don't plan on making a separate /home partition, this is where you "spend" the rest of your disk space. Recommended file systems here are BTRFS or EXT4. BTRFS has some advantages over EXT4 for your root filesystem that I will not explain here, but the main one is that it supports Snapshots for easily backing up your system. Make sure to also click on the root flag in the list and make its Mount Point / as shown in the screenshot below.
